The post 16 Incredible Forced Perspective Examples (+ Tips) appeared first on Digital Photography School. It was authored by Nate Kay.

Are you looking for forced perspective examples? We’ve got you covered!
In this article, we share 16 amazing examples of forced perspective photography. We also offer a handful of quick tips – so that if you want to capture some beautiful images of your own, you know exactly what to do.
Ready to be blown away? Let’s dive right in.
What is forced perspective photography?
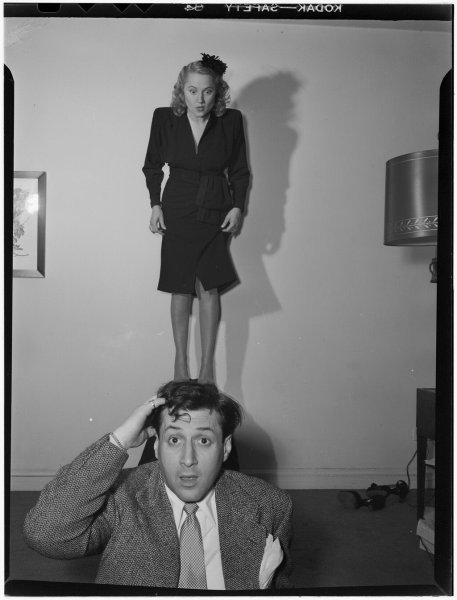
Forced perspective is a technique that manipulates human perception to make objects appear larger, smaller, farther, or closer than they actually are.
Generally speaking, a forced perspective photo contains a near (foreground) subject and a distant (background) subject. Through careful positioning, the photographer makes the two subjects appear on the same plane – when they are, in fact, several (or hundreds) of feet apart.
Even if you’ve never heard the term “forced perspective” before, you’ve probably seen classic examples of this type of image: tourists pretending to prop up the Leaning Tower of Pisa, people “holding” one another in the palm of their hands, or a person “crushing” a building with their foot.
Amazing forced perspective examples
Check out these 16 outstanding examples of forced perspective photography! Be warned, however: They’re incredibly mind-bending.


3 quick tips for amazing forced perspective photos
Capturing jaw-dropping forced perspective shots isn’t hard. You just need to know a few tricks:
1. Choose a small foreground subject and a big background subject
The best forced perspective images tend to feature a clear foreground and background subject.
So I recommend you select these in advance. The background subject should be many times larger than the foreground subject. Look at the examples above; see how the foreground element appears slightly larger than (or equal in size to) the background element. That only happens when the foreground is small and the background is big!
The most basic method is to position a person (or a person’s hand) in the foreground and a (reasonably) tall building in the background. This is a perfectly valid approach, and when you’re just starting out, it’s a great way to have plenty of forced perspective fun.
Over time, you’ll start to notice more and more photo opportunities, and you can create more complex images that include unique foreground and background subjects.
2. Use a narrow aperture to keep the entire scene in focus
To create the most effective forced perspective illusion, you must trick the viewer into believing that your foreground and background subjects exist on the same plane.
Which means that your foreground and background subjects should both appear sharp. After all, two objects on the same plane should feature identical levels of sharpness!
If you simply point your camera and shoot, you’ll often end up with a sharp foreground subject and a blurry background subject (or vice versa). Instead, you should switch your camera over to its Manual or Aperture Priority mode, then dial in a narrow aperture (such as f/8, f/11, or beyond). I’d also encourage you to switch your lens over to manual focus, then adjust the focus ring until you’ve focused about a third of the way into the scene.
The narrow aperture will ensure that your shot has a deep depth of field, and by carefully focusing your lens, you can keep the entire scene in focus (from foreground to background).
3. Carefully position the foreground subject
To maintain a forced perspective illusion, you must make sure that your foreground subject’s position sells the shot.
Don’t just position the subject sloppily. Instead, pay careful attention to the effect you’re trying to create – and make sure the foreground subject lines up perfectly with the background. If your subject is “touching” a building with an outstretched finger, the finger should be positioned right on the edge of the object. If your foreground subject is “holding” another person in their palm, the background subject’s shoes should be aligned with the top of the foreground subject’s hand.
Pro tip: If you’re struggling to position your subject, try leaving it and moving your camera instead. And if you can’t sell the effect without perfect positioning, I encourage you to use a tripod; it’ll keep your camera in place while you adjust your settings as needed.
Forced perspective photography examples: final words
Now that you’ve finished this article, you know to create beautiful forced perspective shots of your very own – and you’ve seen plenty of amazing examples!
So head out with your camera and practice. Pay careful attention to positioning, control your settings, and select the perfect foreground and background subjects. Good luck!
Which of these forced perspective photos is your favorite? What do you plan to shoot? Share your thoughts in the comments below!
The post 16 Incredible Forced Perspective Examples (+ Tips) appeared first on Digital Photography School. It was authored by Nate Kay.
0 Commentaires