The post 5 Creative Lenses for Beautiful and Artistic Photos appeared first on Digital Photography School. It was authored by Simon Bond.

Are you looking to capture artistic photos? Do you want to work with creative lenses that’ll take your images to the next level, fast?
In this article, I share my top five favorite creative lens options for photographers. Some of the lenses are cheap, some are more expensive, but all guarantee fun and unique results.
So if you’re ready to take images that stand out from the crowd, then let’s dive right in, starting with my first pick:
1. A fisheye lens
Fisheye lenses produce an ultra-wide rounded effect, like this:

Which means you can use them to distort corridors, warp skylines, and even bend faces.
Fisheye lenses are a lot of fun to work with; they’re plenty versatile, and once you learn to predict how a fisheye lens will render each new scene, you can turn boring subjects into stunning works of art.
Fisheye lenses aren’t too expensive, either. You can grab third-party options for a couple hundred dollars, and you can even purchase cheap fisheye lens accessories for your smartphone.
Here are a few basic ways to get started with a fisheye lens:
- Capture some standard wide-angle landscapes. Fisheye lenses are decent wide-angle lens alternatives, especially if you like that ultra-wide look. To minimize distortion, you’ll need to position the horizon line toward the middle of your image.
- Move on to some “round-earth” compositions. Once you start to understand the way the fisheye renders the world, try heading to a body of water, such as a lake or – better yet – a beach. Position the horizon line near the top or bottom of the frame, then watch as it’s warped like crazy!
- Combine the fisheye effect with leading lines. See if you can find a scene filled with lines. For instance, you might look up a spiral staircase or down a long corridor. Let the fisheye lens create lots of interesting distortion effects.
Of course, you don’t need to stick to landscape and architectural images. You can create stunning fisheye portraits by positioning the lens close to the subject. Try playing around with different vantage points, too!

2. A Lensbaby Composer
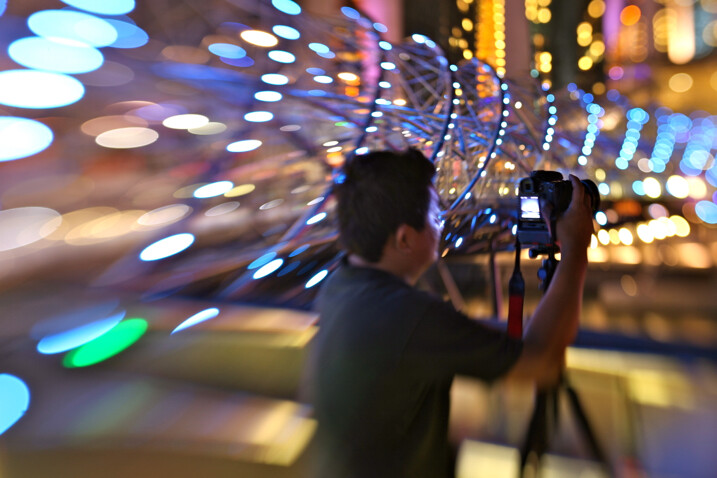
The Lensbaby Composer allows you to adjust the part of the frame with the sharpest focus, and while the best way to understand the Composer’s effect is to simply use one, here’s a simple example:

For the shot displayed above, I focused on the photographer’s camera and let the rest of the scene blur into oblivion.
You can use the Composer to highlight faces, emphasize flowers, capture creative abstracts, and much more. A few easy ideas:
- Photograph fairy lights. If you shift the angle of the composer lens, you can create stretch bokeh (see the left side of my example image). Try photographing fairy lights, but be sure to focus in front of the nearest lights and make sure to shift the point of focus.
- Do Lensbaby portraits. As I hinted at earlier, Lensbaby lenses are a great way to draw the viewer’s eye straight toward the model’s face. By rendering a sharp subject surrounded by background bokeh, you can create a captivating portrait; just make sure you keep a little distance between the subject and the background.
- Try to shoot landscapes. Lensbaby Composers aren’t known for their landscape capabilities, but in my experience, you can use them to capture uniquely artistic scenic shots. Look for strong subjects – such as lone trees in fields – with plenty of distance between the subject and the background. Focus on the subject, then let the background blur into beautiful bokeh!
3. An ultra-fast lens
A fast lens features a wide maximum aperture, often in the area of f/1.8, f/1.4, or even f/1.2.
And while you can use a fast lens to capture conventional photos, you can also use a fast lens to produce highly creative works of art.
You see, the wider you open the lens aperture, the stronger the background bokeh. So by working at f/1.8 or wider, by carefully positioning your subject in front of a colorful backdrop, and by ensuring there’s plenty of distance between the subject and the background, you can create beautiful images that combine a sharp subject and lots of background bokeh:

You’ll need a lens that’s at least 50mm (and an 85mm focal length works, too). You’ll also need to pay careful attention to the light; you can create especially cool effects by combining a shaded subject with a well-lit background.
One more tip: When working at f/1.8, the depth of field will generally be razor-thin, so make sure that you nail focus on your subject!
4. A macro lens
Macro lenses offer lots of magnification, and this is a great way to capture unique images of frequently encountered subjects.

Unfortunately, macro lenses can be on the expensive side, but if you don’t want to shell out for a true macro lens to begin with, you do have the option of trying out close-up filters, extension tubes, or the reverse-lens technique.
What’s special about macro photography is the focus on hidden, unseen worlds: the bed of moss at the foot of a tree, the water droplets inside a tulip, the intricate arrangement of a spider’s web – all of these offer plenty of gorgeous subjects! Here are a few ideas:
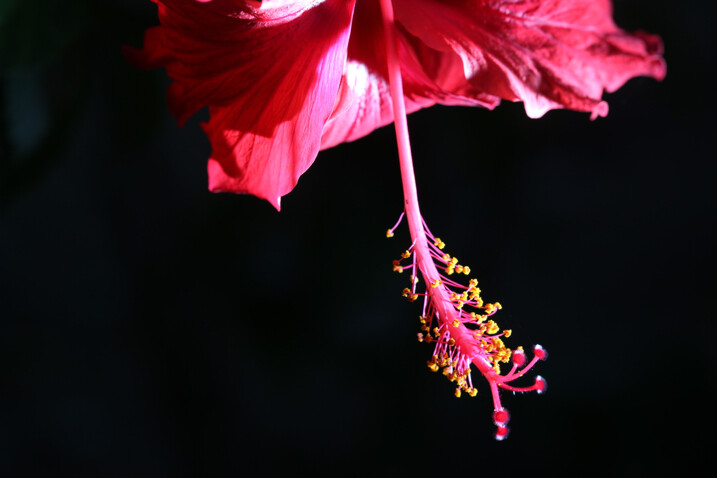
- Photograph flowers. A macro lens will get you up close to flowers. You can capture abstract images of the petals, you can highlight all the tiny pollen granules on the anthers, or you can capture creative shots of the flower stem!
- Shoot water droplets. Water droplets are a macro photography classic. At high magnifications, the droplets will loom large in the frame. You can even create refraction images by placing a beautiful subject, such as a flower, behind the water droplets.
- Capture household items. A macro lens can make pretty much anything look interesting! Try selecting boring household objects – like money, food, or fabric – then zoom in close and see what you can create!

One more tip: At high magnifications, the depth of field will be tiny and your autofocus will struggle. I’d recommend switching over to manual focus, and if you need to, try a focus-stacking technique.
5. A tilt-shift lens
Tilt-shift lenses can do two things:
- They can tilt, which adjusts the plane of focus so that close-up and distant objects are similarly sharp.
- They can shift, which helps correct perspective distortion.
Shifting isn’t so useful for creative photography, and it’s primarily used by architectural shooters – but tilting is a great way to compose images with an interesting “tiny worlds” look. Parts of the image is in focus, while parts fade into blur, making the scene look like a miniature model:

Unfortunately, tilt-shift lenses are designed for professionals and tend to be very expensive. But you do have other options; for instance, you might consider freelensing, which lets you adjust the plane of focus by detaching your lens from your camera body.
You might also consider creating a tilt-shift effect in post-processing. No, it’s not quite as satisfying as producing the effect in-camera, and it’s not always quite as realistic, but it can still look great!
Which creative lens will you choose?
Hopefully, you now realize that you have tons of creative options. You can work with a macro lens, a Lensbaby, a tilt-shift lens, and more.
So which will you choose? Which lens will you try? Share your thoughts in the comments below!
The post 5 Creative Lenses for Beautiful and Artistic Photos appeared first on Digital Photography School. It was authored by Simon Bond.
0 Commentaires