The post Rule of Thirds in Video: The Essential Guide appeared first on Digital Photography School. It was authored by Jaymes Dempsey.

The rule of thirds is a simple composition technique that can instantly enhance your videography, but how does it work? And how can you use it to improve your videos in post-production?
In this article, I’ll explain everything you need to know about the rule of thirds, from the basics – what it is and how to follow it – to more advanced techniques, such as how to apply the rule to real estate footage, landscape footage, wedding footage, and more.
I’ll also explain how to adjust your compositions in VideoProc Vlogger, the just-launched, beginner-friendly video editing software from the company behind the popular VideoProc program. (Bonus: It’s completely free!)
So if you’d like to improve your videos in the field and in the editing room, then let’s dive right in, starting with the essentials:
What is the rule of thirds in videography?
The rule of thirds is a compositional guideline designed to make your visuals more balanced and dynamic.
Specifically, the rule states that the best compositions position key elements a third of the way into the frame. It comes with helpful gridlines:

The idea is simple, at least in theory. When faced with a scene, you – the videographer – should position key elements somewhere along the gridlines, and when possible, at the intersection of two gridlines.
(These intersections are known as power points, because they improve your compositions even further.)
So if you’re shooting a mountain at sunset, you might position the horizon line along the lower horizontal gridline, then make sure that the camera pans until the main mountain peak falls across a power point. Make sense?
The rule of thirds isn’t really a rule – just a guideline. But it is a great way to make your videos look professionally composed, and it’s a technique used all the time in movies, TV, commercials, and more.
In other words: You don’t need to follow the rule of thirds religiously. But if you can learn to incorporate it into your shooting – if you can learn to think in terms of the rule of thirds gridlines as needed – then your footage will improve dramatically.
Now, you can apply the rule in two basic ways:
- You can plan out your shots using the rule of thirds, then keep your subjects aligned with the gridlines while recording.
- You can record, then crop to satisfy the rule of thirds (when editing).
If possible, it’s best to nail the composition in-camera; that way, you don’t lose resolution during post-production. However, if you’re shooting at high resolutions and exporting at low resolutions, or you aren’t too obsessed with pixel-perfect quality, you can always adjust your footage to nail the rule of thirds after your shoot is over, as I discuss in the next section:
Applying the rule of thirds in VideoProc Vlogger: step by step
VideoProc Vlogger is a powerful new program designed to make video post-production quick, easy, and intuitive, plus it costs nothing. You can download the software here.
And in VideoProc, literally anyone can use the rule of thirds to enhance their photos; all it takes is a few simple clicks. Here’s how it works:
Step 1: Prepare your footage for editing
Once you’ve launched VideoProc Vlogger and started a new project, you’ll need to bring your clips into the Media Library.
Simply drag and drop the relevant files onto the Library panel:

Or tap Add Video, then browse through your files for the relevant footage:

Then drag the clips down to the Timeline:

And you’re ready to go.
Step 2: Add horizontal and vertical guides to approximate the rule of thirds
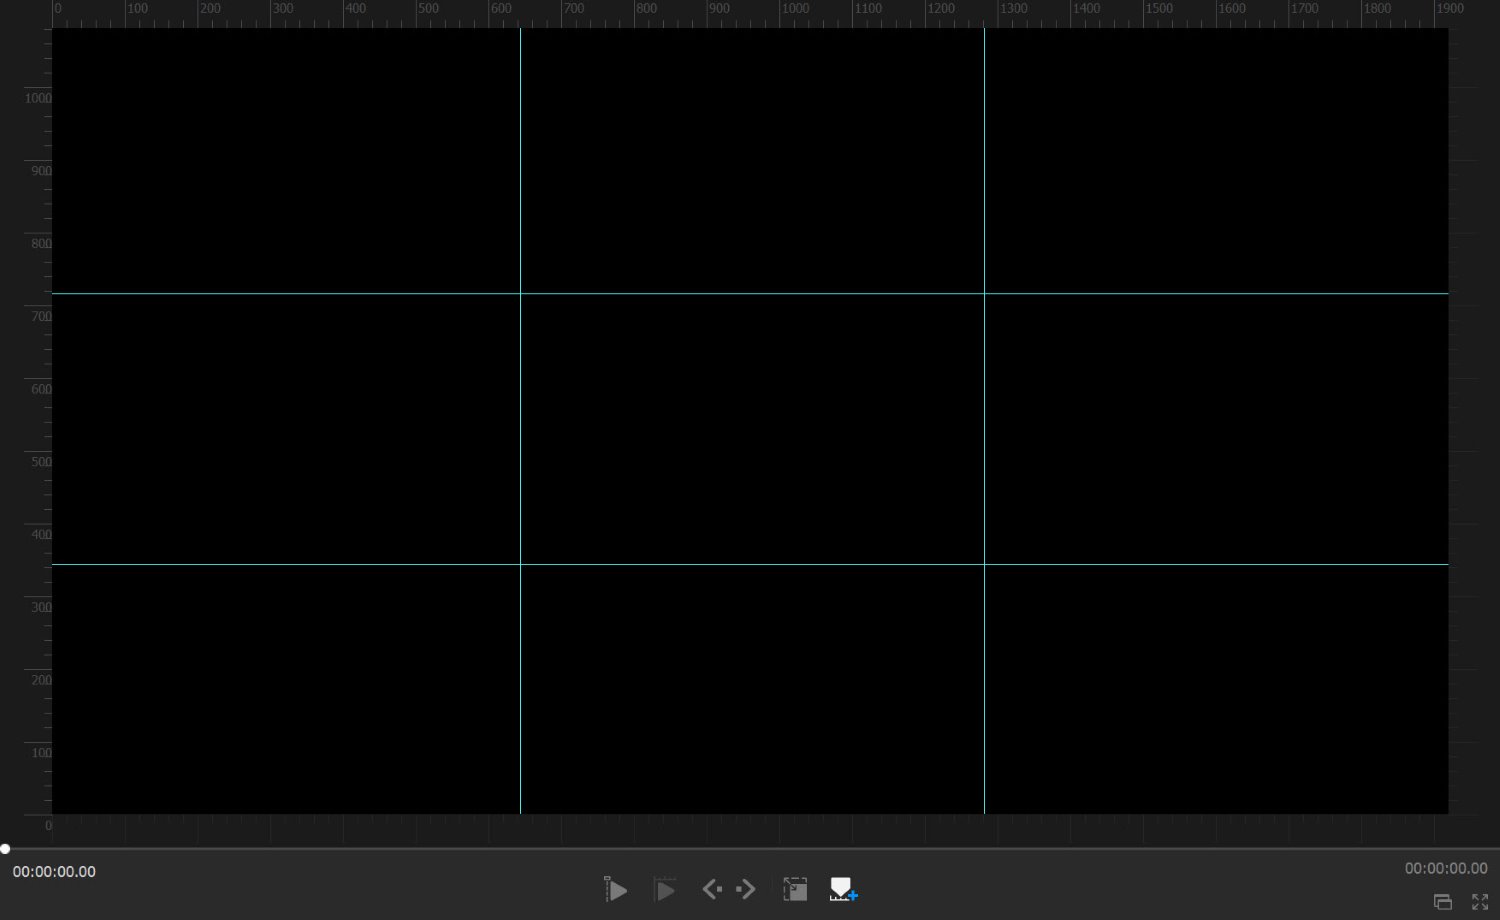
VideoProc Vlogger allows you to easily create guides on your preview screen. Our goal is to recreate the rule of thirds gridlines, like this:

First, you’ll need to identify the dimensions of your frame. For this example, I’m working with a 1920 x 1080 (HD) video. (If you’re not sure, you can always check the desktop file, or you can click the little i Info button on the clip thumbnail in VideoProc.)
Second, take the width and divide it by 3. Do the same for the height.
To use my example, 1920 divided by 3 equals 640, and 1080 divided by 3 equals 360.
Next, make sure the Show Rulers button is selected:

Tap the Horizontal Guide button:

Then place two horizontal guides: one at around 640 pixels, and the other at around 640 x 2 (1280) pixels.
Finally, tap the Vertical Guide button and place two vertical guides: one at around 360 pixels and the other at around 360 x 2 (720) pixels.

And there you have it: a rule of thirds grid, right in your Preview panel.
If you’re worried about accidentally adjusting your guides, you can always hit the Lock Guide button:

Step 3: Use the rule of thirds to evaluate (and crop) your footage
Once you have your rule of thirds gridlines in place, I recommend playing through your footage, paying careful attention to key elements, including:
- Horizon lines
- People
- Bright, eye-catching objects
- Any other main subjects
Ask yourself: Are these key elements frequently aligned with the rule of thirds gridlines? If the answer is “Yes,” then you’re doing great – but if you come across a clip where the answer is “No,” you can simply select the Crop tool:

Then adjust your footage until it’s rule-of-thirds compliant.
Pro tip: If possible, ensure the aspect ratio of the crop matches the original aspect ratio of the footage; otherwise, you’ll need to scale the footage (and you’ll lose parts of the frame in the process).
When should you apply the rule of thirds in VideoProc Vlogger?
While you can technically use the rule of thirds at any stage in your editing process, I highly recommend you add the gridlines and evaluate your composition at the very beginning of your workflow.
Compositional arrangement tends to affect everything about a recording, from its mood to its ideal color grade to its ideal speed, so it pays to determine exactly how your composition will look before proceeding with any other edits.
Case studies: how to apply the rule of thirds in real-life situations
Up until this point, I’ve explained how to use the rule of thirds, but I haven’t talked much about common situations you’ll run into when filming and how you can use the rule of thirds to enhance your footage.
Let’s take a look at a few likely scenarios:
Real estate videography
In real estate filming, you’ll want to pay careful attention to a few features, including major appliances, eye-catching furniture, wall lines (i.e., the point where one wall ends or intersects with another), and floor lines (i.e., the point where the floor intersects with the wall).
Aim to position wall lines along vertical gridlines and floor lines along horizontal gridlines:
[rule-of-thirds-video-14]
You can also position appliance and furniture edges along the gridlines and (ideally) at power points, like the kitchen island in the example above.
By the way, it’s generally better to pan than to capture static shots, but make sure you move into the final composition. In other words, pan until the scene meets the rule of thirds, then cut.
Night videography
Shooting at night can go many different ways, but I do recommend you think about the horizon line; as I discuss in the next section, you’ll want to position it along the top or bottom horizontal gridline.
This clip could use a bit of rule-of-thirds adjusting:

For instance, I might crop at the top to emphasize the foreground (and get rid of the boring sky).

I can also align interesting subjects with the horizontal gridlines, like the busy road on the left-hand side.

Landscape videography
When filming landscapes, always check the horizon line. In rare cases, it can work to place this dead-center – but in general, I recommend positioning it along the top or bottom horizontal gridline.
Which option is better? That depends on the scene. If your footage includes a lot of foreground interest, such as a river, rocks, or even a rustic cabin, then you’ll want to minimize focus on the sky by positioning the horizon along the top gridline:

But if your footage contains very little foreground interest and/or a beautiful sky, the reverse is the way to go.
Food videography
In general, your food compositions should feature a main dish or main food item, often surrounded by other supporting dishes, food items, or utensils.
You’ll want to position your main subject along a gridline or at an intersection point. You’ll also want to pay attention to the table edge; if it’s present in your composition, it may sit most naturally along a horizontal gridline.
Here, you can see the pitcher of syrup, which sits along the top gridline, positioned above dessert, which sits along the bottom gridline:

Wedding videography
While wedding scenes include a lot of variation and can be somewhat unpredictable, you might aim to put the happy couple along the two vertical gridlines. Check out this clip, where the bride and groom start in the center of the screen…

…but eventually align perfectly with the rule of thirds gridlines:

Starry sky videography
As with landscape videography, you’ll need to check your horizon lines carefully. You’ll likely want to position the horizon along the lower horizontal gridline; that way, you can emphasize the beautiful sky:

However, in situations with especially interesting foreground elements, you might position the horizon along the upper horizontal gridline instead.
Rule of thirds in video: final words
Now that you’ve finished this article, you are well equipped to use the rule of thirds in your own videography.
Just remember my tips on composition, and be sure to download VideoProc Vlogger so you can evaluate (and adjust) your compositions after shooting!
Digiarty, the creator of VideoProc, is a paid partner of dPS.
The post Rule of Thirds in Video: The Essential Guide appeared first on Digital Photography School. It was authored by Jaymes Dempsey.
0 Commentaires